
Last week was full of Valentine’s activities and special treats. I was so busy, that I wasn’t able to get the dessert recipes up, but I’m sure you’ll forgive me, right? You can make these any time. So get on it. Or tuck these away for Valentine’s Day next year….it never hurts to be prepared!
First up, Dark Red Velvet Cookies. Oh yes, boy.

These were chewy and cocoa-y, and filled with milky, melty chocolate.
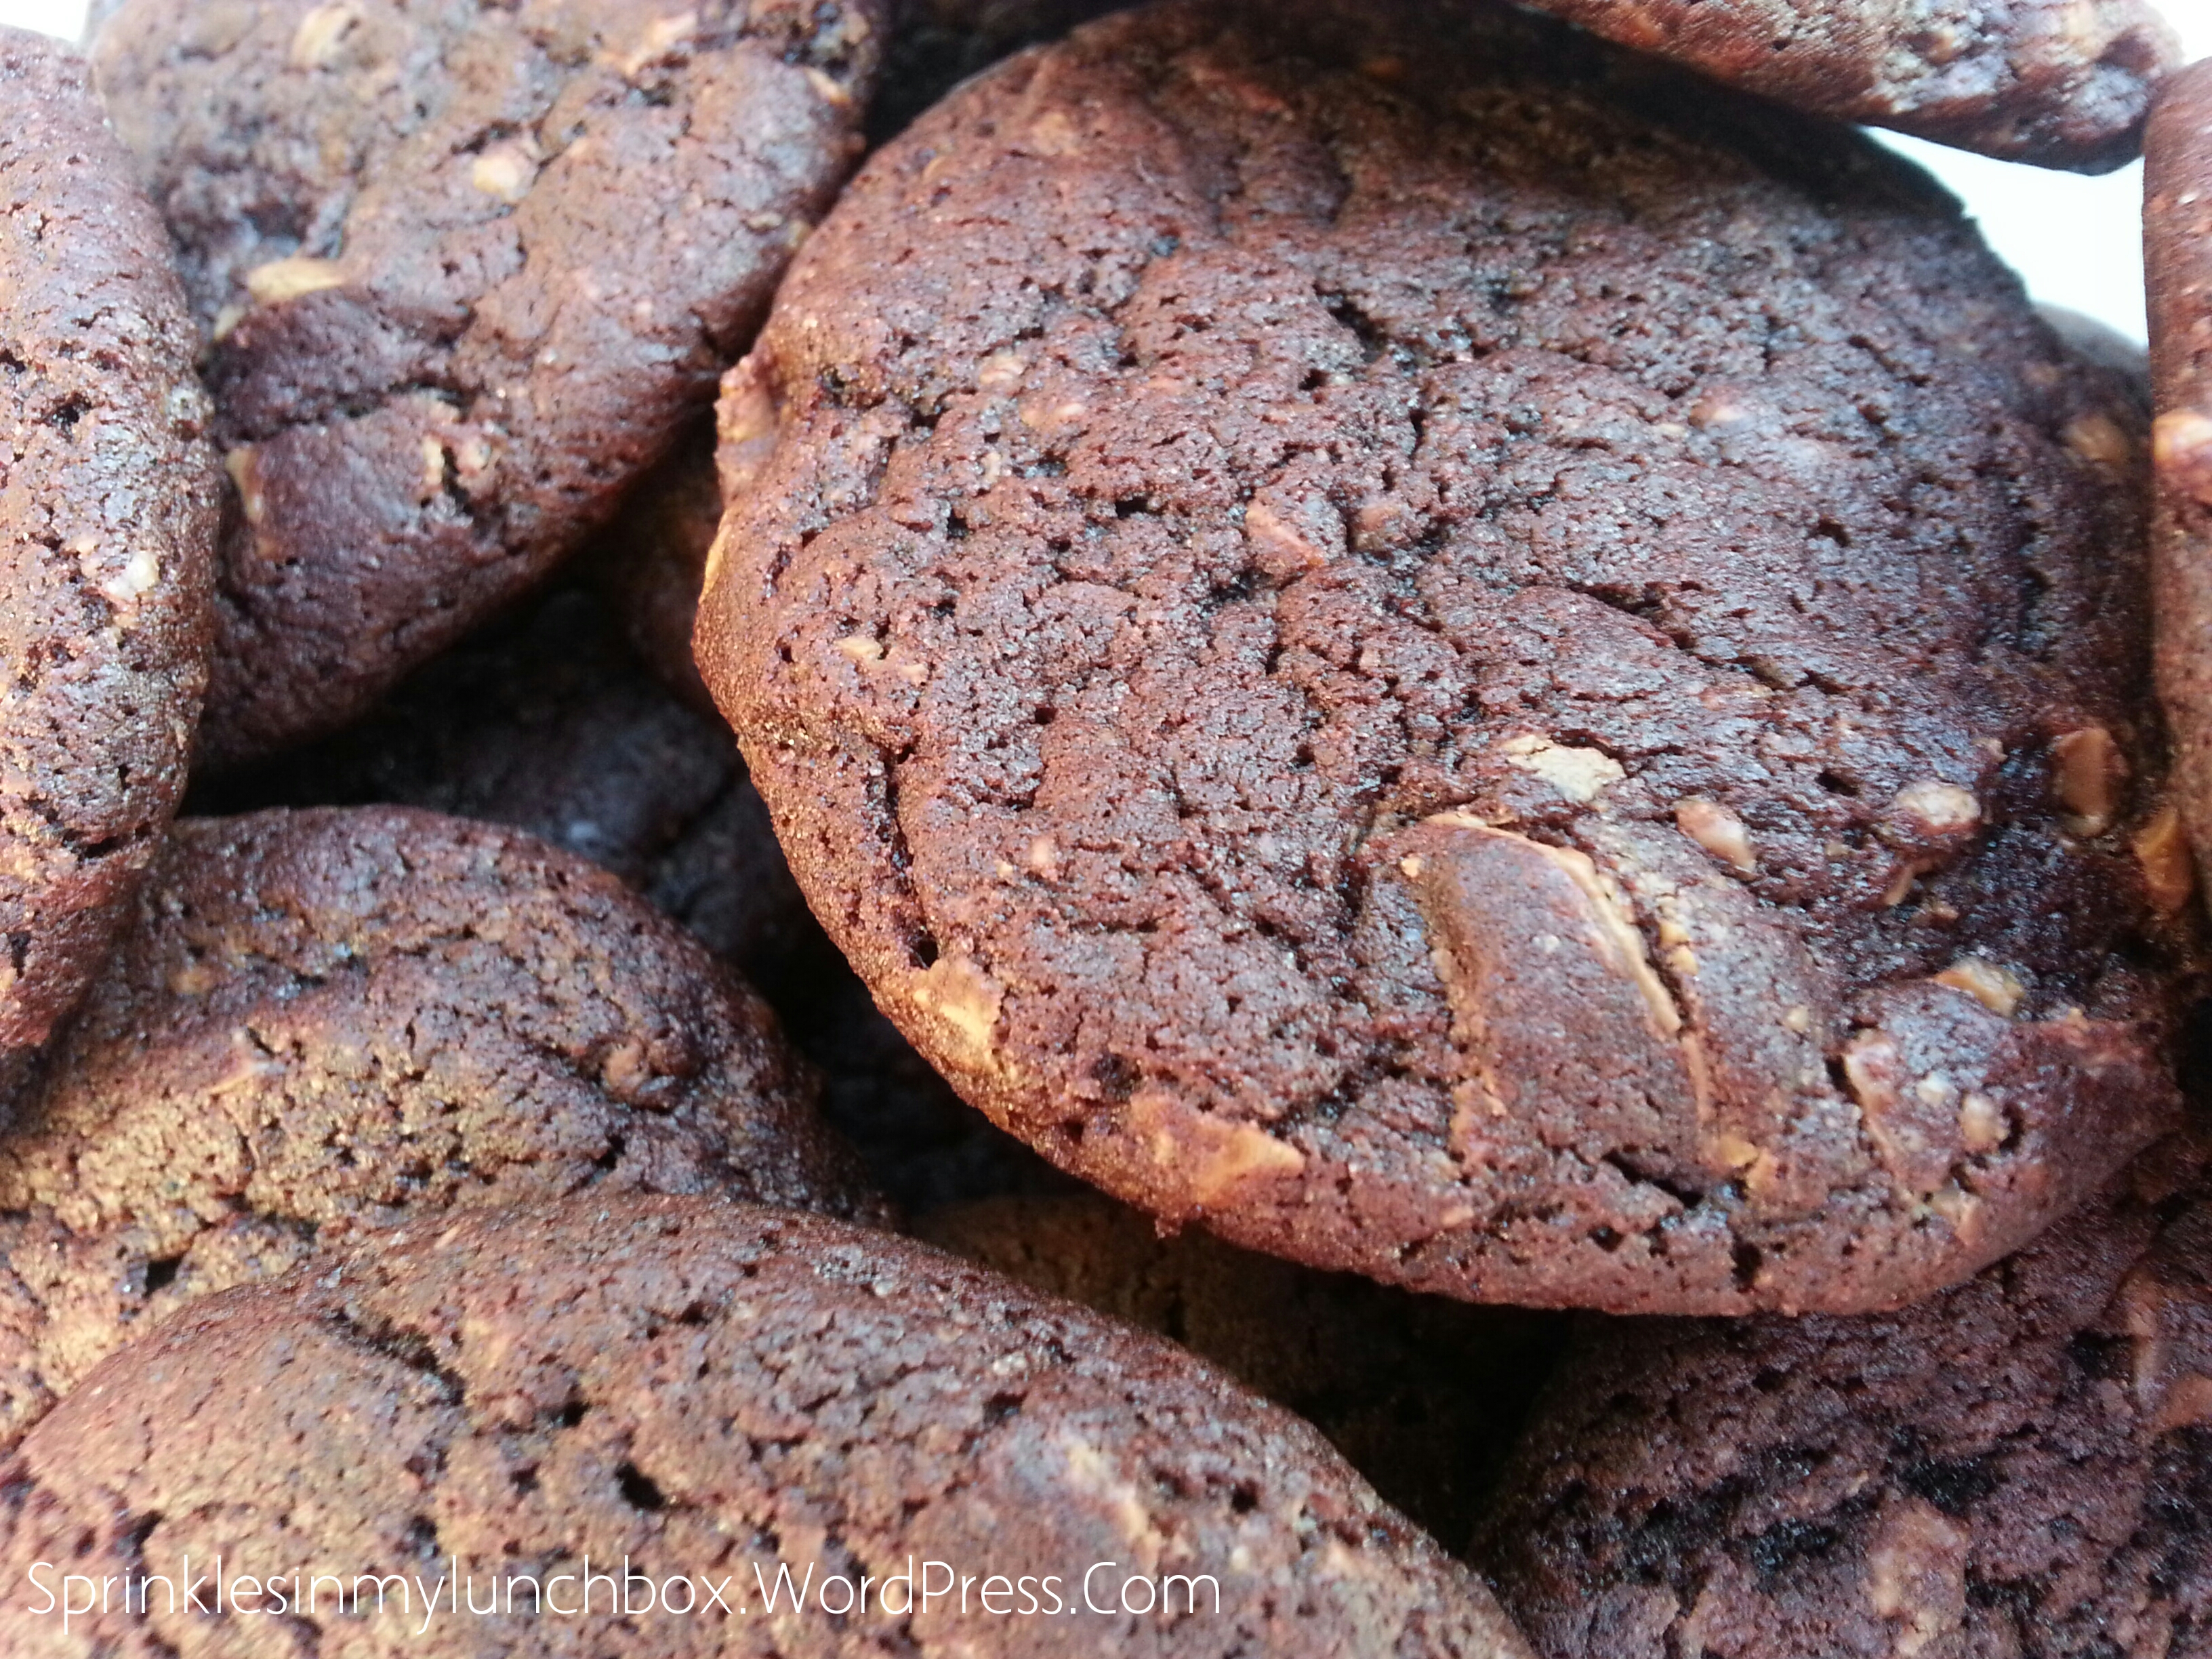
Such a fun treat for the lunchboxes!
Dark Red Velvet Cookies
Recipe adapted from: Sally’s Baking Addiction, Red Velvet Chocolate Chip Cookies
1.5 C + 1 T AP flour
1/4 C dark cocoa (I used Hershey’s Special Dark)
1 t baking soda
1/4 t salt
1/2 C unsalted butter, softened
3/4 C brown sugar
1/4 C granulated sugar
1 egg, at room temperature
1 T milk
2 t vanilla extract
1.5 T red food coloring
1 c milk chocolate chips
Toss together the flour, cocoa powder, baking soda, and salt together in a large bowl.
With a handheld or stand mixer, beat the butter, in another bowl, on high speed until creamy. On medium speed, add the sugars and beat until combined. Beat in the egg, milk, and vanilla extract. Once mixed, add the food coloring and beat until combined. Add the dry ingredients to the wet ingredients. Slowly beat until a very soft dough is formed. Beat in more food coloring if you’d like the dough to be redder. On low speed, beat in the chocolate chips. The dough will be sticky.
Cover the dough and chill in the refrigerator for at least one hour (up to several days). Thaw, as needed, before baking.
Preheat oven to 350F degrees. Line two large baking sheets with parchment paper or silicone baking mats.
Scoop the dough and roll into balls. Bake each batch for 10-11 minutes.
Allow the cookies to cool on the cookie sheet for 5 minutes before transferring to a wire rack to cool completely.
Switching directions to gluten and dairy free –

I’ve made these GF DF peanut butter cookies many times. They always come out perfectly.

They have all the ingredients needed to make for an old-fashioned peanut butter cookie feel.
I also added raspberry jam to a few:

I love how these came out. The jam added a chewy goodness to them. I can’t even. Actually I could. And I did.
http://www.wholefoodsmarket.com/recipe/gluten-free-peanut-butter-cookies
And lastly, but still gluten and dairy free – Chocolate Torte!
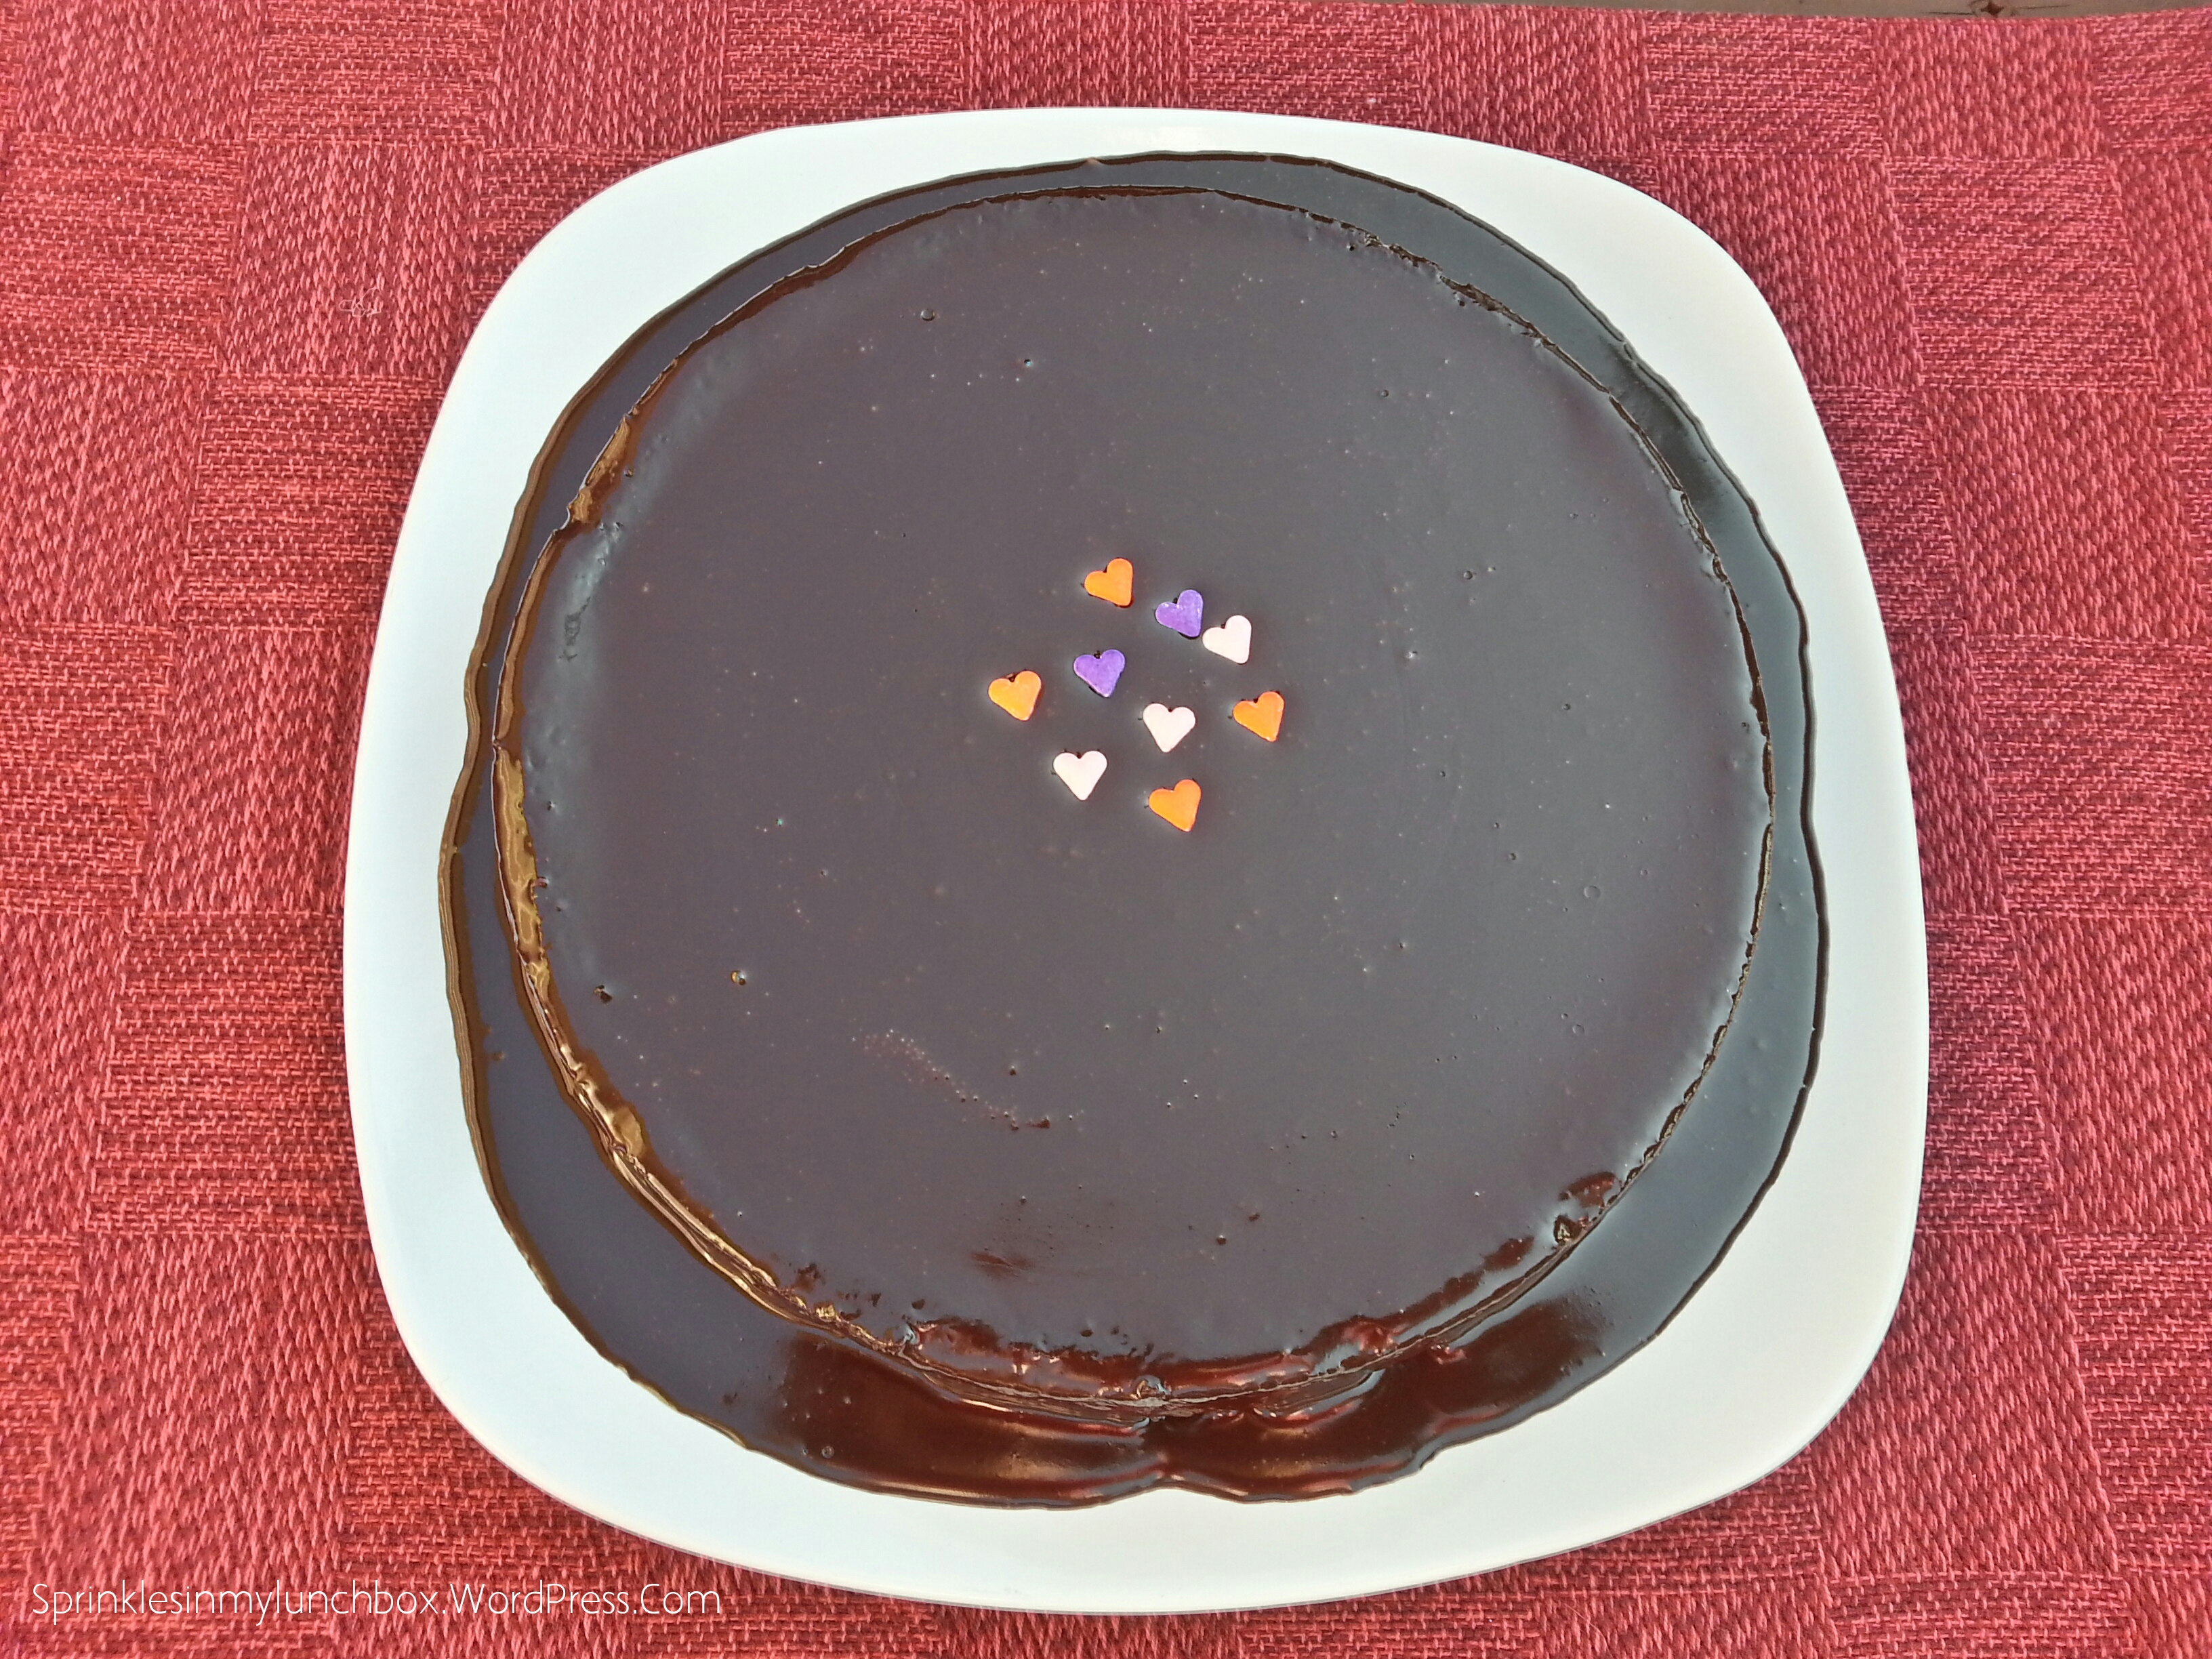
This thing is a showstopper. It’s super glossy in the picture, because I had just poured my cashew milk ganache on top.
Yes. Cashew milk ganache. And it’s ridonkulously easy.
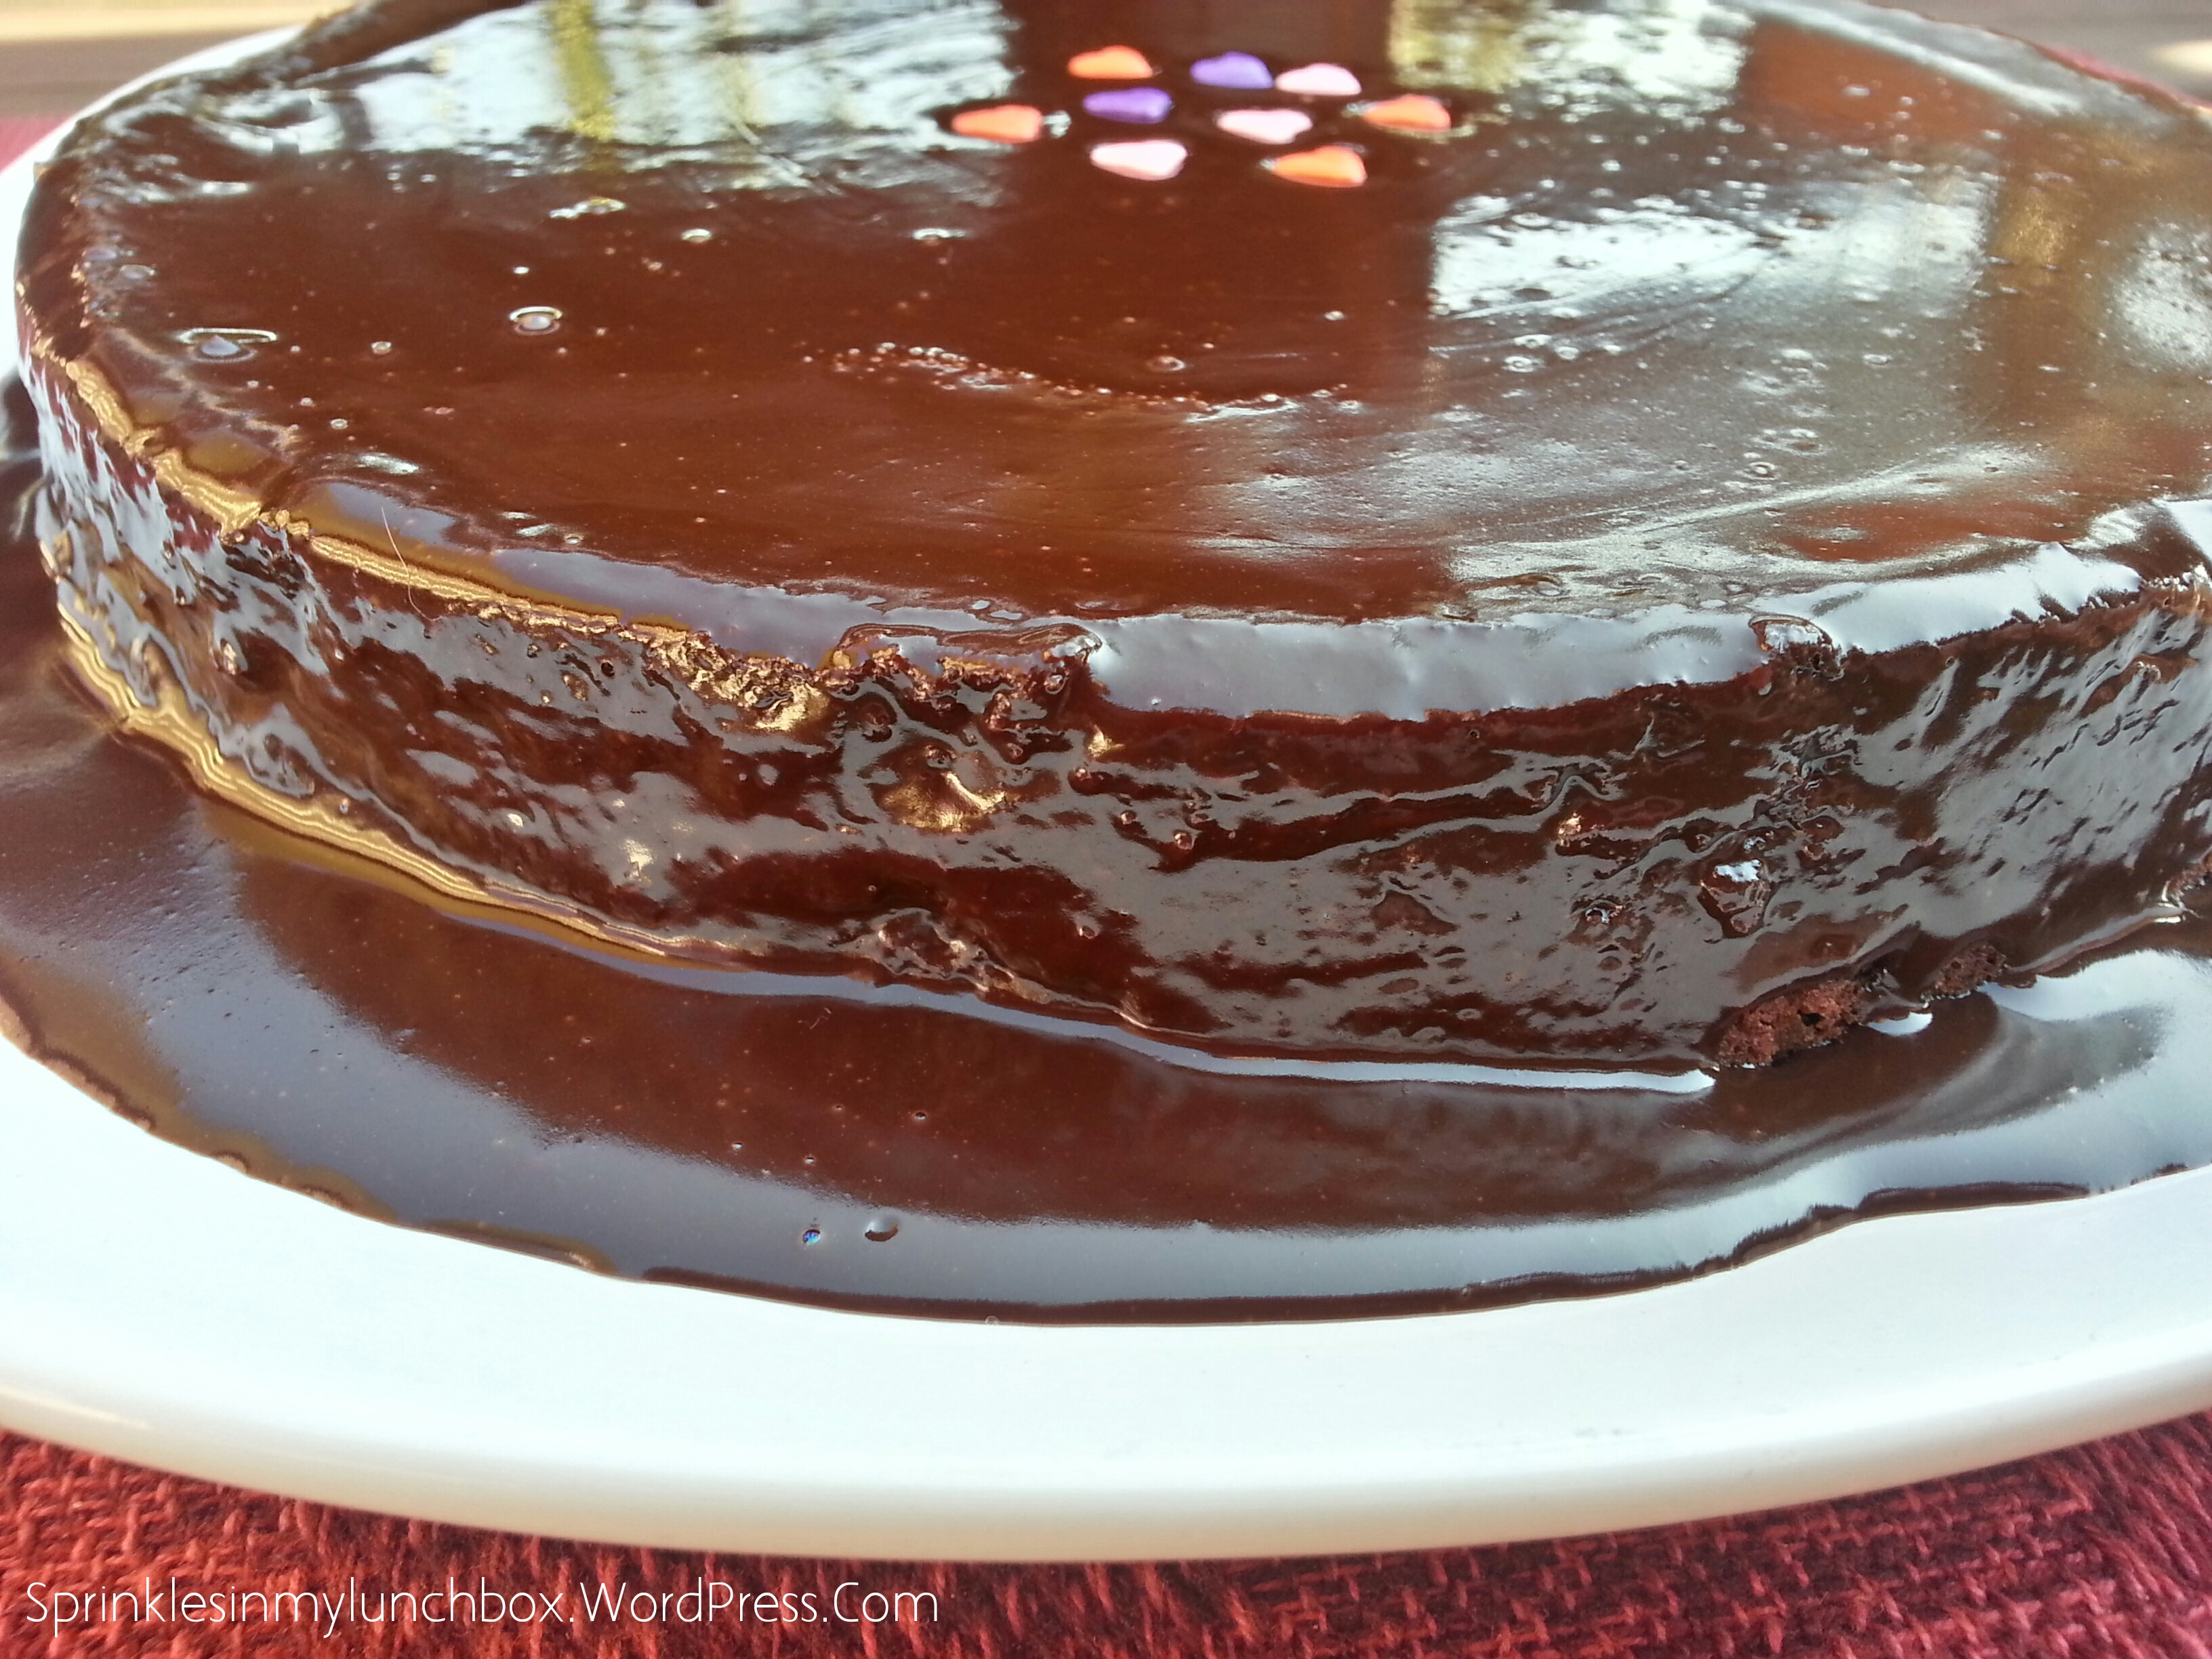
Look at that freshy.
Gluten and Dairy Free Chocolate Torte
Recipe adapted from: King Arthur Flour, Flourless Chocolate Cake
1 C semisweet chocolate chips
1/2 C (8 T) unsalted butter
3/4 C granulated sugar
1/4 t salt
1 t vanilla extract
3 large eggs
1/2 C unsweetened cocoa powder
Preheat the oven to 375°F. Lightly grease an 8″ round cake pan. Fit a piece of parchment paper in the bottom. Grease that as well.
Put the chocolate and butter in a microwave-safe bowl, and heat until the butter is melted and the chips are soft. Stir until the chips melt, reheating briefly if necessary (you can use a double-boiler if preferred). Transfer the melted chocolate/butter to a mixing bowl.
Stir in the sugar, salt, and vanilla. Add the eggs, beating briefly until smooth. Add the cocoa powder, and mix just to combine.
Spoon the batter into the prepared pan. Bake the cake for 25 minutes; the top will have formed a thin crust.
Remove it from the oven, and cool it in the pan for 5 minutes.
Loosen the edges of the pan with a table knife and turn it out onto a serving plate. The top will now be on the bottom; that’s fine. Also, the edges will crumble a bit, which is also fine. Allow the cake to cool completely before glazing.
To make the glaze: Combine one cup of semi sweet chocolate with one half cup of non-dairy milk (or cream, if you want dairy) in a microwave-safe bowl, and heat until the milk is very hot, but not simmering. Remove from the microwave, and stir until the chocolate melts and the mixture is completely smooth.
*I have used both cashew and coconut milks for this and they both turn out beautifully.*
Spoon the glaze over the cake, spreading it to drip over the sides a bit. Allow the glaze to set for several hours before serving the cake.
EAT.
Enjoy these sweet treats!
Kristin
